Every man should have an island

Every man (and woman) should have an island. Or at least that is what I think!
The idea came from a few places, first – at a modelling and simulation conference someone gave a talk about an island created by NATO to use with training simulations.

Second, I read about a game, The Wittness, that is set entirely on a single Island. Maybe games like Myst and Riven, My Min City and a bunch of others also had an influence.

And thirdly, the concept of procedurally generating terrain, islands and even complete planets and environments greatly intrigues me.

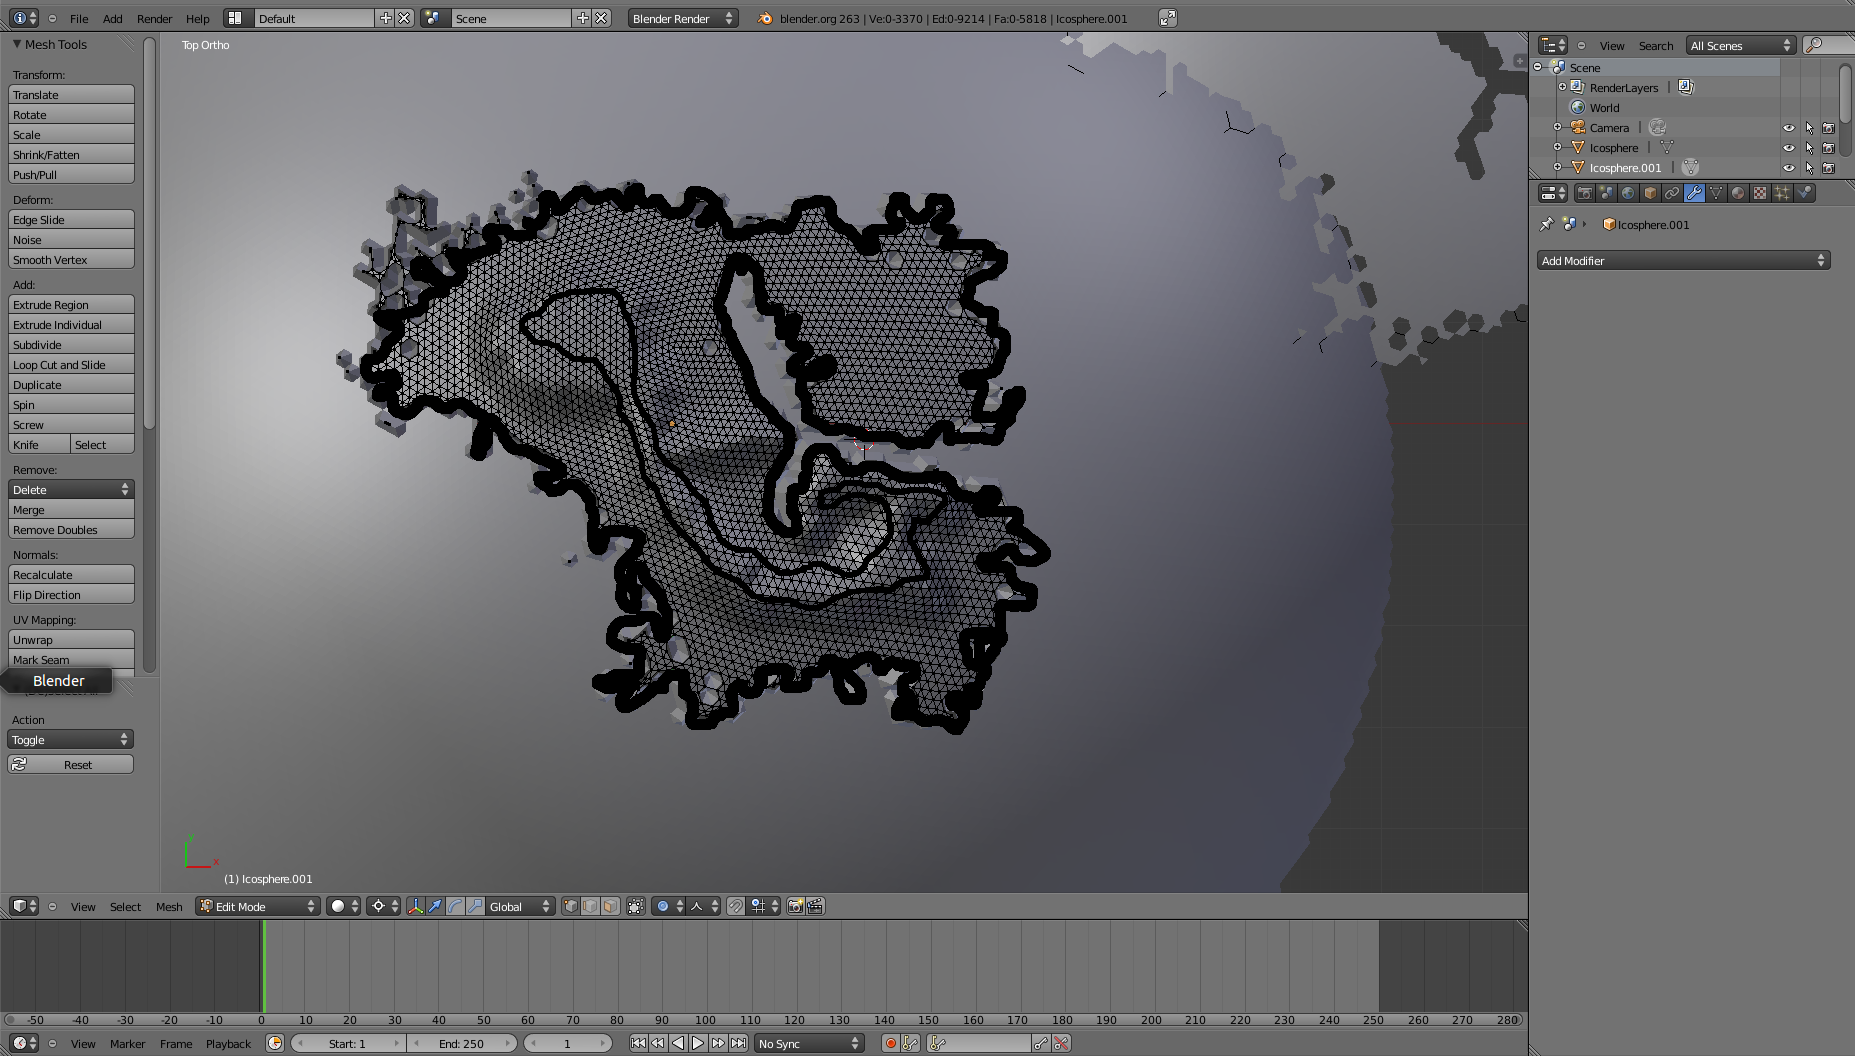
I started by playing around in blender and after some unsatisfying results I took a step back. Direct manipulation is nice, but I also want to create something generative.


isla-falta

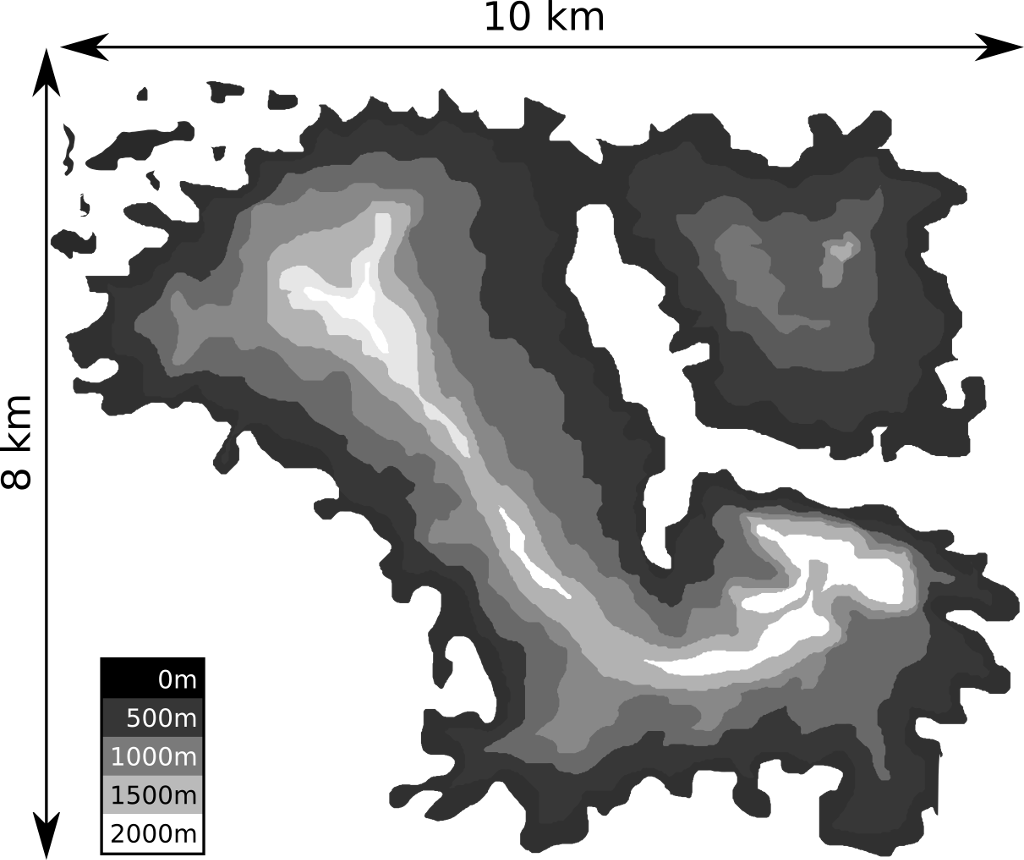
I started by drawing a more map like island using Inkscape, below is the result:


isla-falta-map

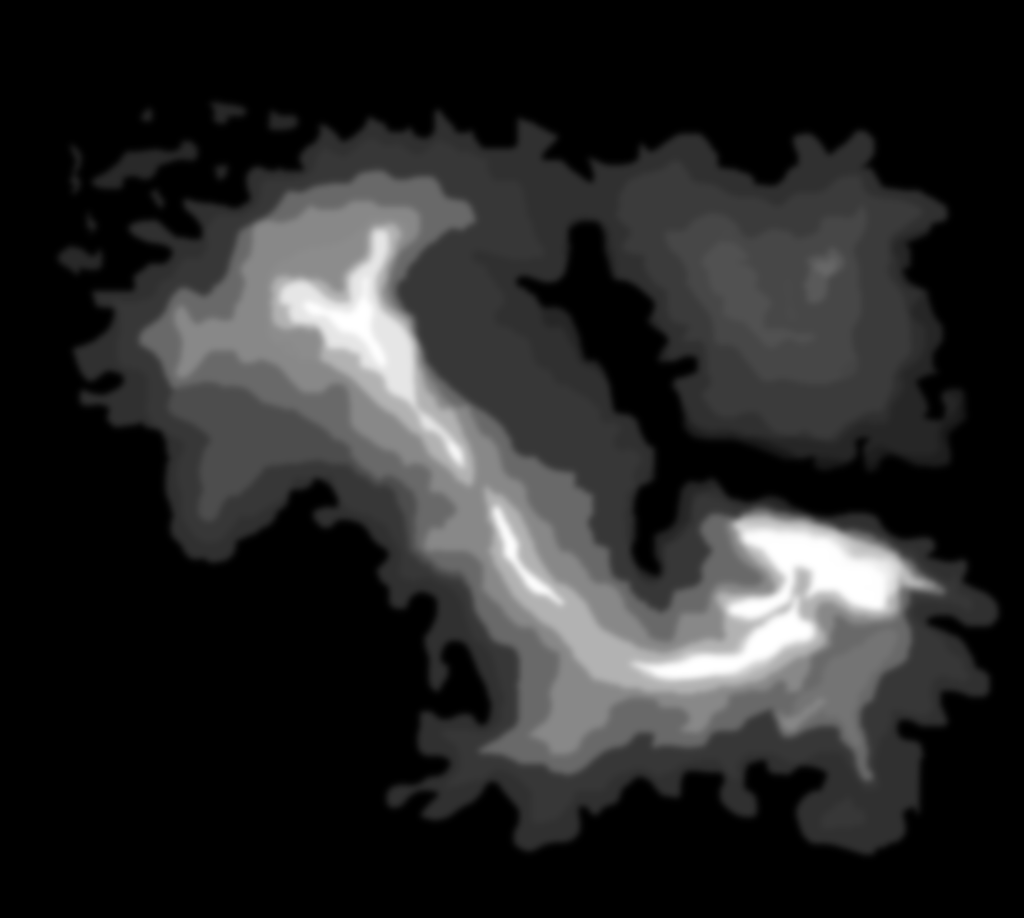
After this I exported the map to gimp and played with the raster image a little:

isla-falta-hm-1024-918

This feels like it is getting somewhere. I can imagine seeing the map displayed somewhere and the height map looks nice, but the actual terrain is rather bland and when yo look at it closely it is very artificial.

falta-render

Next step, start writing code!

I decided to experiment with the diamond square algorithm. It can be used to generate terrains that are semi realistic and it is also possible to seed to algorithm to give some shape to the result! I implemented two flawed versions of the algorithm, one vanilla version and one seeded version. The image below shows the output from the different implementations. The code is written in python and lives in github.

combined-small

And this is where I’m at at the moment. The height map can be used to generate a 2.5D terrain that looks somewhat realistic. It still feels artificial, the peaks doesn’t look that great and the resolution of the height map is static, but it’s getting better!

falta-render-2

So what is next? I’m working on a WebGL version, just so that it can all happen in your browser. Creation of the seed image will still be up to you. Next I would like to consider implementing a dynamic level of detail (LOD) algorithm that can keep on generating realistic terrain when you get closer. Then there are texturing, foliage, etc.

And that’s all for now.

This year I will learn stuff!!

So, the year is 2013 and it will be remembered as the year I started dabbling with physical bits of tech! Things like this, this and this!

I want to learn the basics of electronics and some manufacturing techniques like mold making, casting, etc.


How I will learn

While I love reading and will probably read up a lot on the things mentioned above, I plan to learn mainly by doing. Doing short focused projects with tangible output. Some of the current ideas that I have are making a pinball machine, making a 3D scanner and making a wind driven marble machine!

I plan on using the internet a lot and open education resources as far as possible (I have one or two college textbooks lying around)! I also hope to get some advise from people that knows a lot about the things I want to learn.

I also intend to tell people what I'm busy with and what I have learned from completing a project and hopefully getting some constructive feedback.


Why am I telling you this, publicly, on the internet!?

Well, two reasons actually. One - I tend to struggle with follow through and saying this publicly gives me a little more incentive to get serious about it :)

And two, learning is way too important to rely on other people to map out what you learn. Education is something that you should do yourself. You know what you like, you know what you want to achieve and you know how, when and where you learn best. And if you don't know these things the solution is to find out, not to hand your education over to a government, university, company or even worse - no one!

Go forth and hack your own education!

Octasphere

A while back I played a bit with webgl and decided that I want to draw a sphere.

UV spheres have their problems, so I considered doing a icosphere. But to draw an icosphere you have to start with and icosahedron and then subdivide. Generating the initial coordinates for the icosahedron felt like too much work for the lazy me.

Instead I opted to start with an octahedron and subdivide from there. An octahedron has a modest 6 coordinates that you need to start with and they happen to lie on the primary axis!


I have no idea why octospheres aren't more popular? Until my experiment, I've never knowingly encountered one?

You can find the code on github!

Visualizing Lernanta's inter-dependancies

This project happened during a flight from Berlin to Durban on the 1st of October.

The data comes from a small project that I've done earlier, but the visualization using HTML5 canvas happened in transit!

Update: Forgot to say that the code is available on github

pi in a box

Yes, of course I'm talking about the raspberry pi! When I received my pi the first thing that I decided to do with it was to put it back in a box. But not its original box, a new and improved box that would allow me to use it!

So I got out a cutting board, a carpet knife and an old cereal box. Here is what happened:
Not yet folded
Folded, closed with some pi inside!
I made one mistake in my original box - I forgot to add a hole for the power adaptor.

Although this box works without any glue, it doesn't work that well. For my next pibox, I'm thinking of a way of keeping everything together without any glue! I didn't originally plan to go all hippie with the recycled material and the gluelessness, but the idea grew on my as I proceeded!

Notifications at P2PU

Over at P2PU we recently revised how we do notifications. A mayor part of the update is allowing people to reply directly to a notification by email.

Any module in P2PU can send a notification to a user. If the module supports receiving a reply to the notification, it passes a callback URL to the notification module when it sends a notification.

   notify(user, 'subject', 'notification text', '/comments/4/reply')

The callback URL get saved together with a response token that is then attached to the email address the notification is sent from.

   reply+@reply.p2pu.org

We make use of sendgrid for sending and receiving email. Sendgrid provides a API called parse that handles receiving email. The parse API calls a specific URL on P2PU whenever a reply is received.

The reply then gets handled by the notification module where the token is verified and the user sending the reply is determined.

The notification module then uses the callback URL to let the original module know that a user responded and passes along the user and the reply text.

   POST /comments/4/reply user='Bob', text='The reply text comes here'

A P2PU API story

We've had some thoughts, talk and implementation for a P2PU API. It seems like everyone agrees that it's a good idea and something that we need, but we are lacking concrete use cases. Maybe because we don't have the complete API yet - the classic chicken and egg problem.

So I propose that we start by building a few prototypes of what we would like to use an API for. A prototype doesn't need to be a running program, although a running prototype would be great! We just need something a little bit more tangible to help us think about the ideal API that we want for P2PU.

A prototype may look something like this:

Lets say you want to build something to run a MOOC, you will need to use the following parts of P2PU:
  • Authentication
  • User profiles
  • Activity
  • Notifications
  • Messaging
  • Badges

User story

So lets think up a little about a user story:

You go to mooc.org and see a mooc that you like - "The study of geographic and temporal art as encountered in urban environments - SOGTA". You decide to sign up for the MOOC. When you click on sign-up you get redirected to P2PU to sign-in to your P2PU profile. Once you signed in, you are asked by P2PU if you want to allow mooc.org to send you notifications and publish activities to your activity feed?

Once you confirm you are redirected back to mooc.org. You am now signed up for SOGTA with your P2PU profile. On mooc.org you can participate in group discussions. Whenever you get a reply to a message that you posted in a discussion, you receive an email in your inbox. When you reply to the email, your message is also posted in the group discussion thread.

Every week you receive an email from the MOOC organizer that informs you what's happening with SOGTA.

On mooc.org there is a list of courses that is relevant to SOGTA. You can participate in these courses together with other people that is also signed up for SOGTA. There is also lots of references to other learning resources like coursera.

Finally, after participating in the MOOC, you receive a SOGTA participation badge to show that you completed the MOOC. This badge is shown on your profile at P2PU, but it's stored in your open badge backpack.


Prototype

Interaction between mooc.org and p2pu.org may look like this.

When someone at mooc.org creates a new MOOC, the MOOC gets published to the course register at p2pu.org:

https://api.p2pu.org/courses PUT {'title': 'The study of geographic and temporal art as encountered in urban environments', 'shortcode': 'SOGTA', 'signup-url':'mooc.org/sogta/sign-up', 'course-style':'MOOC',  'tags':['art','geo-art'], ... }

Now the "The study of geographic and temporal art as encountered in urban environments" will show up when someone searches for "geographic art" on the P2PU course register!

https://api.p2pu.org/courses also support GET,POST and DELETE to query, update and delete courses from the course register

When a user signs up for a MOOC on mooc.org, the browser will be redirected to https://p2pu.org/login. After the user successfully logged in, they get a token and user profile from p2pu.org and that is passed onto mooc.org (handled by javascript without the user knowing anything about it). mooc.org then does a post to

https://api.p2pu.org/user/verify-login POST {'user-profile':'https://p2pu.org/username', 'token':'bd46c283195c0aefaffb179f6197f18d184d38b8'}

which respons with 200 OK to indicate that the user is logged in and that the token is valid.

mooc.org can now safely add https://p2pu.org/username to the list of users that signed up for the MOOC. mooc.org also sends a message to https://p2pu.org/username to give the user instructions about SOGTA

https://api.p2pu.org/send-message POST {'user-profile':'https://p2pu.org/username', 'subject':'Welcome to SOGTA', 'content':'We are glad that you joined SOGTA ...' }

p2pu.org automatically add 'app':'mooc.org' to the data and depending on the user's preferences is sent a message to the email address registered with p2pu.org

Whenever a significant action is performed in SOGTA by a user, mooc.org does the following:

https://api.p2pu.org/activity PUT {'subject':'https://p2pu.org/username', 'verb':'post', 'object':'https://mooc.org/sogta', 'verb-url':'https://mooc.org/sogta/comment/135', 'message':'user posted a comment in the MOOC SOGTA'}

This is only allowed if user gave permission to mooc.org to post activity. If this failed mooc.org may choose to do

https://api.p2pu.org/activity PUT {'verb':'post', 'object':'https://mooc.org/sogta', 'verb-url':'https://mooc.org/sogta/comment/135', 'message':'A new comment was posted in the MOOC SOGTA'}

https://api.p2pu.org/activity GET {'noun':'https://p2pu.org/user'} - will return all activities involving user

https://api.p2pu.org/activity GET {'noun':'https://mooc.org/sogta'} - will return all activities involving SOGTA

When a user makes a comment and receives a reply, something like this can happen:

https://api.p2pu.org/notification PUT {'profile':'https://p2pu.org/username', 'subject':'[SOGTA] reply to comment', 'message':'Someone replied to your comment', 'email-reply-possible':'True'}

This call returns {'reply-token':'005f035e7d1b1c2ff6de0d4a73cc2f040d5b4127'} to mooc.org

The user receives an email if notifications are allowed for mooc.org. The email look like this:

From: reply+005f035e7d1b1c2ff6de0d4a73cc2f040d5b4127@reply.p2pu.org
Subject: [mooc.org] [SOGTA] reply to comment
Message:
Someone replied to your comment.

You can respond by replying to this email with your text:


When the user replies to the email, mooc.org gets a post from p2pu.org at the URL that mooc.org had to supply when registering to use the P2PU API:

https://mooc.org/api/message-in PUT {'from':'https://p2pu.org/user', 'reply-token':'005f035e7d1b1c2ff6de0d4a73cc2f040d5b4127', 'message':'???'}

I haven't yet thought through the badge API for this scenario.

So start thinking about how you would like to use an API to interact with P2PU and what you will build and send it to us at p2pu-dev@lists.p2pu.org

Learning Lernanta


I recently took a dive into the source code of a project called Lernanta. Lernanta is the Django based software platform that is used by Peer 2 Peer University to facilitate peer learning on the web! You can see it in action at p2pu.org

While trying to figure out how the code base comes together to form the final web application, I was presented with many challenges. One of those challenges was that I didn't know about everything that Lernanta does. Another challenge was (and still is) that terminology used in the source code differs from the terminology used on p2pu.org.

In this post I intend to outline the relevant top level entities of Lernanta. I will also try to explain how these entities corresponds to the source code.


Users

Users are probably the most important entity on P2PU. Without users no peer learning will be possible and everyone working on P2PU will probably get very lonely and depressed.

Lernanta uses django.contrib.auth for authentication and profiles are managed by the users app.


Courses

On the P2PU website a course may be know as either a course, challenge or a study group. Courses, challenges and study groups provides different ways for users to interact with learning material, but they have a lot of features and functionality in common.

On the source code side of things we have projects. Projects stores the category of the course. The category indicates if a given project is a course, challenge or a study group.

Users can participate in a project. If the project is a course or challenge the uses is taking the challenge and if it's a study group, the user joins the group.

Users can also follow a project. In this case the user does not participate, but rather observers.

One or more users will also be course facilitators. These users are responsible for running the course.

On the software side of things participation is indicated by a Participation entity. Participation is also used to indicate if a participant is also a course facilitator using the organizing property.

Users following courses are indicated using a Relationship entity. A relationship entity is automatically create for an participant, thus a participant is also a follower.

Course content is created by adding tasks to a course. In the source code tasks are represented by Pages that are part of the content application in Lernanta. Pages are versioned to preserve their history.


Schools

Schools are used to group together courses that are about a similar topic. Currently there are the School of Webcraft, the School of Education, the School of Social Innovation and the School of Mathematical Future. As I am speaking, the School of Data is being launched!

Schools each have a dedicated page with more information about the school and sets of courses associated with the school. Schools can also have specific sets of courses that they want to be displayed on their landing page.

In Lernanta, schools are implemented using the schools app. Courses can be associated with a school using the school property. Sets of courses are managed by schools.models.ProjectSet. Users doesn't need to belong to a school in order to participate in a course offered by a school.


Badges

Users can earn badges to show what they have learned. Badges are OBI compliant and users can push a badge to their Open Badge Backpack.

On p2pu.org there are several different types of badges. The first type of badge is a project completion badge. This badge gets automatically awarded to a user whenever they complete the challenge associated with a badge.

Another type of badge is a skill badge. To get this badge, a user must apply for the badge and submit proof that they satisfied all the criteria for the badge. The submission then needs to be reviewed by other users and assessed according to the rubrics associated with the badge. Once enough users assessed the submission, the badge can be awarded to the applicant

Finally there are community badges. Community badges can be awarded by any user doing a course by another user doing the course.

In Lernanta, the badges application is used to implement the above mentioned badges. Badges are represented by badges.models.Badge. Associated with a badge is badges.models.Rubrics and badges.models.Logic. Rubrics are used to indicate what rubrics should be considered for a skill badge, while Logic indicates how many assessments are necessary and what the average rating for a rubric should be.

The relevant entities for badges

When a user apply for a badge, badges.models.Submission is used. When a user reviews a badge, badges.models.Assessment is used. badges.models.Rating is associated with an assessment and a rubric to indicate the rating that the user gave corresponding to the assessment and the rubric.


A final word

If you would like to get involved with the development of Lernanta, I recommend that you proceed by setting up your development environment by following this guide.

backing up your delicious bookmarks

As some may have heard, delicious is being acquired by AVOS. You can transfer your bookmarks, but I decided to make a backup of my bookmarks, just in case.

The quickest way I could think of, was using the RSS feed.

Log into your account on the web and get the URL for the "Private RSS Feed" at the bottom of the page. Change the last part of the URL to be larger than the number of bookmarks you have saved on delicious.

Ex. change
"http://feeds.delicious.com/v2/rss/user_bob?count=15"
to
"http://feeds.delicious.com/v2/rss/user_bob?count=1000"
in the URL.

You can safe the page your browser displays when you enter the URL, or you can use wget or another utility to download the feed.

The data is now in your hands and it's up to you to keep it safe.

High resolution dependency graph

I generated a high resolution Gentoo Linux package dependency graph.

Packages are ordered according to their complete Gentoo package name. The result is that the graph shows groupings of packages with lots of dependencies or reverse dependencies. These groupings typically fall under dev-*, kde-*, gnome-*, x11-libs or media-*.

Text labels are only generated for packages with more that 10 dependencies or reverse dependencies. The numbers in brackets after the package name, is the number of dependencies followed by the number of reverse dependencies.

Packages grouped by categories (1600x1600)

A package of particular interest is app-text/sword. It has a total of 165 reverse dependencies!! This is very large number of packages that depends on app-text/sword! All of the packages that depends on app-text/sword seems to be different modules specifically for sword.

A nice picture of (dependency) hell

"Dependency hell" refers the difficulty that arise when installing a software package that requires a lot of other software packages to be installed. The required software packages (or dependencies) may themselves require other software packages to be installed.

To give a better idea of why this can be difficult, I created the following graph.
circle graph of software dependencies
63988 Dependencies between 14319 software packages
This graph shows the dependencies between software packages in the Gentoo Linux operating system. In total there are 14319 packages with 63988 dependencies between them!

Packages are drawn on the circumference of the circle and a dependency is indicated by a line draw from one package to another. The color of a package is randomly generated, while the color of a line is determined by the package that is required by the other packages.

Every package has a line starting on the rim of the circle drawn radially outwards. The length of the line is determined by the amount of other packages that depend on the package.

Here is a closeup of a small part of the graph:
circle graph of software dependenciesThe most common dependencies are development tools. This is a list of the 15 packages with the most reverse dependencies:

Package# of reverse dependencies
dev-lang/perl1559
dev-util/pkgconfig1195
dev-lang/python1047
x11-libs/gtk+1042
sys-devel/libtool950
app-arch/unzip878
sys-devel/automake818
sys-devel/autoconf766
dev-libs/glib652
x11-libs/qt-gui612
virtual/jdk588
sys-apps/sed575
x11-libs/libX11545
app-admin/eselect-python496
dev-util/cmake455

The graph was created with data obtained from the Gentoo Portage tree and drawn using the Python Image Libray (PIL).

Working towards software quality

Software quality remains to be an illusive topic. It's hard to define, measure or enforce.

One way to to define software quality is how well functional and non functional requirements are met. This implies that requirements exists and are accurate. It also implies that the quality of the software changes whenever the requirements change! This is typically the type of software quality that will keep your manager and your client happy, for the time being...

For software that will be used and modified after the initial requirements have been satisfied (most software fall into this category), quality needs to be measured on a deeper level. Aspects like maintainability, changeability, testing, etc comes into play. This however remains hard to measure and enforce.

There are however certain things that contributes to software quality that aren't that hard to measure or implement. Here is a list with some of those things:
  • Requirements
  • Software design
  • Coding standards
  • Version control
  • Bug tracking
  • Source code documentation
  • Code reviews
  • Automated clean builds
  • Automated testing
  • Code analysis tools
  • Config management
  • User interaction

It may be worthwhile to elaborate on topics such as requirements, design and documentation. These are things that can cause considerable overhead when done incorrectly. It a good idea to approach requirements, designs and documentation as tools that are used to arrive at a certain point. As such they contribute to the quality of the software, but does not necessarily represents the system in its current state.

Having all of the above mentioned things in place will not equate to high quality software. It still remains something that needs to be propagated and pursued by all involved parties.

Deep indentation

Having many levels of indentation can seriously hamper readability (and thus the understandability) of code. These indentation levels are normally a result of nested conditional statements and try-catch blocks.

How many levels are too many?

Many people feel that 4 levels of indentation is the limit. This is not a hard rule, but serves as a good guideline.

Another guideline is that your source file should never contain a line of code that gets wrapped around or needs side scrolling. Unfortunately this is dependant on your screen resolution and font size. For some people the limit is at 80 characters (the Linux kernel uses this measure) other people feel that this measure is outdated and wastes screen real estate.

The basic idea is that whenever the amount of indentation levels make it difficult to understand the code, it's too many.

How do I fix it?

One way suggested in “Refactoring: Improving the Design of Existing Code” by Martin Fowler is replacing the conditional with Guard Clauses. Ex.
method body
if condition1 is true
if condition2 is true
…
else
…
can be replaced with
method body
if condition1 is false
return
if condition2 is true
…
else
…
Sometimes it is possible to rework the logic of the method. You may find that some conditionals are excessive or that it can be simplified further.

Many times though, this is an indication that other problems exist in your code. Things like methods that are too big, constant testing for null, using lots of “Type Codes”, implementing different states in one object, etc. In a lot of these cases, addressing the other problems will also fix the problem of multiple indentation levels.

Method stubs and Unused Code

A common thing we all do is creating stub methods on a class and implementing methods we do not immediately use. Both can lead to errors and incorrect results in parts of the code that use method stubs or (previously) unused code.

Method Stubs

Method stubs are functions that aren't implemented. The method body is normally empty, or returns a hard coded value in order to compile. Luckily they are easy to spot. There's nothing wrong in using method stubs when writing and testing the initial interface of a class, but no method stubs should be left hanging around in your code! If you do have method stubs, this can be corrected in one of two ways:

  1. Remove the method stub

  2. Implement the method stub

Most of the time you should remove it. You should only implement a method stub if it is actually used!

Unused Code

Another problem that is more difficult to spot is unused (and untested) code. If you are writing a library that are used by other people you cannot easily determine what methods are used and which ones are not. In this case your test cases should test all methods (actually all code paths).

The best way of avoiding unused methods, is to only create a method when you need it. This is stating the obvious, but we all tend to implement methods we don't use immediately (or ever). Lets look at an example:

A common class we all need and code at some stage is a Vector class. There are many well defined operations that can be performed on a vector, like calculating the length, converting it to a unit vector, addition, subtraction, dot product, cross product, etc. It is very easy to quickly go and define a vector and all the methods for working with it.

Chances are good that you do not immediately need all the methods that you thought up for you class and that that they will contain bugs. Once again, there are two ways of solving this:

  1. Use the method (in a test case)

  2. Remove the method

Option 1 should be executed if you still foresee that it is very likely that the method will be used in the near future or if the implementation entailed a large investment of effort. Most of the time you should strongly consider removing the method.

To sum it up: When writing code, be minimalistic, when using existing code, remove clutter.

Regards

Dirk

Code Smells

From Wikipedia: “In computer programming, code smell is any symptom in the source code of a program that possibly indicates a deeper problem.”

We all need to get things done and most of the time we need to do them in a hurry. Unfortunately the result is that our code are not always a clean as it should be. Fortunately we are not alone in this world and other people experience the same problems that we do.


Code Smells are one of those things that can help us to identify when we are doing things that may hurt ourselves in the future. We may not always be able to fix them, but whenever you encounter a Code Smell, see if you can either justify it or fix it.


Code Smells are not the problem themselves, but they indicate that other problems exist in the code. Solving them is important, but it is even more important to understand why they are bad.

Code Smell for the week: Huge methods/functions

Whenever a method becomes too big it gets hard to follow the logic of the method. Such a method should be broken down into smaller methods that groups together related functionality. If the refactored methods then contains unrelated functionality, consider moving them to separate classes.

When doing the refactoring of big methods, it is common to encounter problems like the constant use of a shared variable throughout the method. This is in its own a Code Smell and may be mentioned at a later stage.

When is a method TOO big?

The size of a method is not the only determining factor. Whenever your method performs more than one definable thing, it's probably too big.

Another telling factor is the levels of indentation within the method. If you start having more than 4 levels of indentation in one method, you have good reason to believe that the method is too big. In methods that are too big, it can become very hard to follow the indentation levels.

Some things to consider:

  1. Don't overdo it. Functions that are too small can hamper the readability of the code.
  2. Don't expose functions to the global name space unless needed.

Please discuss Code Smells amongst each other. It is often more important to know why code smells are bad rather than knowing how to fix them. Knowing why they are bad will most likely result in us producing less Code Smells.

From the attic

Most programmers have a stash of old software projects somewhere. I decided to go and dig up those projects I have and commit them on github. They can all be found

Minesweeper (c++)
I wrote Minesweeper because of my ego back in 2002. A friend of mine was going on about how difficult it is to implement minesweeper, so I decided to see how difficult it could really be. It can now be found here. Here is a screenshot of what it looks like:


Tetris (c++)
This is another classic. Every aspiring game programmer (overeager teenager) have probably written a clone of Tetris. This was my attempt, it's called Blockys Bow, can't remember why I called it that? You can find the source here


Connect More than Three (java)
I enjoyed playing the plastic version of this game, so I decided that that's enough reason to create an intangible one. This was done in Java, some of my first code therein.


Snake (java)
Last and probably least as well. At some time in my life I was clearly bored, didn't have many friends or more disturbingly found it interesting enough, who knows? Point being, I implemented a snake like game in java. As you can see from the screen shot below, everything didn't work like is should. Enjoy the source if you want.


Well, that's all for today. If I receive any motivation (in the form of comments or your projects on github) I'll dig up that stash of pascal code thats lying around somewhere.

A visual haXe example

This example will show you how to create a simple maize-style background in haXe like the picture below:


First we need to create the maize graphic. We do this by extending the flash.display.Sprite class. Lets call the derived class MaizeBackground.

class MaizeBackground extends flash.display.Sprite
{
public function new()
{
super();
}
}


This will create an empty sprite that does not show anything. In order to add some graphics we must either add another flash.display.DisplayObject containing some graphics to the sprite (like a Bitmap, MovieClip or another Sprite) or we must draw something on this sprite using the graphics property of the sprite.

We are going to use the graphics property of the Sprite. So lets add a method called redraw to our class and use this to draw the maize. We should call to this method in the constructor:

class MaizeBackground extends flash.display.Sprite
{
public function new()
{
super();
redraw();
}

public function redraw()
{
graphics.beginFill(0xFFFFFF, 1.0);
graphics.drawRect(0, 0, 800, 600);

var color : Int = 0x000000;
for (y in 0...60)
{
color = color ^ 0xFFFFFF;
for (x in 0...80)
{
var prev = false;
if ( Math.random() < 0.10 && !prev )
{
graphics.beginFill(color, 1.0);
prev = true;
}
else
{
graphics.beginFill(color ^ 0xFFFFFF, 1.0);
prev = false;
}
graphics.drawRect(x*10, y*10, 10, 10);
}
}

var filterArray = new Array();
filterArray.push(new flash.filters.BlurFilter(5, 5, 9));
filters = filterArray;
}
}


The logic for the redraw method is reasonably straight forward. We look at the maize as being divided into rows and columns.

  1. Step through the image row by row.

  2. Alternate between black and white rows

  3. For every column in the row there is a small possibility of drawing the inverted color.

  4. Finally we apply a blur filter to make the crude maize look a little better.


An important thing to note is that the filters only get applied when we assign something to the filters property of a flash.display.DisplayObject. If we simply pushed the new BlurFilter to the filters property, the filter would not have been applied.

Save this class in a text file called MaizeBackground.hx

Now we need to create a main class and add the sprite to the stage. Create a class called MaizeExample:

class MaizeExample
{
static function main()
{
flash.Lib.current.addChild(new MaizeBackground());
}
}


Save this class in a text file called MaizeExample.hx

Finally we need to create a compile file for the haXe compiler and compile the swf. Create a file called compile.hxml with the following contents:


-swf maize.swf
-swf-version 9
-main MaizeExample


Save the file in the same directory as MaizeBackground.hx and MaizeExample.hx and run haxe in that directory.

This should produce a swf file that can be opened using Adobe's flash player or browser plugin.

The MaizeBackground example could benefit from many improvements:

  • Add size properties to determine the size of the maize.

  • Play around with the different filters available in the flash.filters package

  • Change the size of the cells to be determined by a property

  • etc


Any comments or suggestions are more than welcome!

Installing NekoVM and haXe on Gentoo

Installing NekoVM and haXe on gentoo is done best by using the ebuilds provided by Daniel Turing.

To install the overlay, you need Layman and Subversion. Have a look at Gentoo Overlays: Users' Guide to set up layman if you haven't done so already and make sure you have emerged subversion.

Manually download the text file layman-haxe.txt using your browser or wget:

$ wget http://svn.xinf.org/haxe-gentoo-overlay/layman-haxe.txt


Open up the text file with your favourite editor and replace the line

src="http://xinf.org/haxe-gentoo-overlay"

with

src="http://svn.xinf.org/haxe-gentoo-overlay"

alternativeliy use

$ mv layman-haxe.txt layman-haxe.backup
$ sed 's#src="http://#src="http://svn.#g' layman-haxe.backup > layman-haxe.txt


now check out the overlay using

$ layman -o file:///path/to/file/layman-haxe.txt -f
$ layman -o file:///path/to/file/layman-haxe.txt -a haxe


You can now install the neko, haxe and swfmill that's in the overlay using

$emerge neko haxe swfmill


To install the latest version of NekoVM (1.8.0 at the time of this writing), you first have to create a local overlay. Follow the instructions on gentoo-wiki.com to do this.

Create the following directories in your local overlay: dev-lang dev-lang/neko dev-lang/neko/files

Copy 50_mod_neko.conf and 50neko from the layman haxe overlay into the dev-lang/neko/files directory. Copy this text into dev-lang/neko/files/neko-1.8.0-gentoo.patch. Copy neko-1.7.1-r1.ebuild from the layman haxe overlay to dev-lang/neko/neko-1.8.0-r1.ebuild.
(update: here is a link for the patch for neko 1.8.1)

Download neko-1.8.0.tar.gz into your distfiles directory. All that's left to do is to generate the manifest file. Use

$ ebuild neko-1.8.0-r1.ebuild digest


to generate the digest file. You will need to execute this command as a user with privileges to write to the dev-lang/neko directory.

Now you can emerge the latest version of neko!

Update: the haxe and neko ebuild together with the patches can now be found at github

Over to KDE4.2

After some initial struggles (gentoo-user mailing list) I have managed to update to KDE4.2.

I will not say that this applies to everyone, nor will I make a sweeping statement like "KDE is back", but, KDE is back on my desktop and I'm reasonably happy with it!

I'm using a reasonably dated machine, AMD Athlon XP 2500, NVidia GeForce FX 5200 128MB and 640MB DDR333. Not the greatest machine, but after disabling all desktop effects, things are running quite smooth.

I decided to give the new Kickoff menu a go since KDE4.1.3. Although it's not what I am used to, it is still not something that will completely deter me from using KDE4. After all, if I really can't adapt, I can always go back to the classic style menu.

There is however a few things that I think could be improved. The first thing is adding shortcuts to the bottom panel. I always keep a few icons in my panel - konsole, the home folder and firefox at least. When I wish to add an icon to the panel , the widgets need to be unlocked. I feel that even when the widgets are locked, you should still be able to add icons to the panel. Having different context menus depending on the locked status of the widgets are a big confusing. For me the main advantage of locking the widgets is the absence of that configuration bar next to desktop applets. But, this is also no show stopper, I only need to add shortcuts for my favourite applications once.

Another thing didn't work that great was Okular. I opened "Learning CMake", but it was painfully slow. I haven't had time to test it with another PDF reader like xpdf or kpdf, so maybe it's just the PDF document?

But overall I'm impressed with KDE4.2. From now on this will most definitely be my default desktop!

Open source flash workflow

I needed to do a project in flash and I needed to find a way to do so on my favourite OS - gentoo linux.

After browsing through a lot of google search results, and links on osflash.org I found what I was looking for. Unfortunately I could not find a single utility to do everything, but true to the linux spirit I found multiple separate utilities that could be used to accomplish what I wanted.

First and most important is haXe. haXe is a open source web programming language. It can compile to javascript, php and swf and the syntax and semantics felt familiar enough for me (I'm used to C++). Using haXe you can produce swf files that can be opened using Adobe's flash player.

The second important utility that I found was swfmill. swfmill compiles xml and resources into swf. This is very usefull as it allows you to build resource libraries that you can use from your haXe code.

I decided to use make as the build system - didn't want to learn too many new things at once.

I used vim as my code editor since I wanted to test what doing a whole project in vim would be like and syntax highlighting exists for haXe!

For graphics I used a combination of gimp and inkscape.

This combination of utilities enabled me to create a flash application without needing to buy the Flash SDK, windows, photoshop or anything for that matter. It could also be possible to target an older version of flash like flash 7, which could then be opened using the open source gnash!